The Ultimate Guide to Lip Stains: What They Are & How to Apply Them
KEY TAKEAWAYS
Unless you’ve been on a very long social media hiatus, you’ve probably noticed that lip stains are having their viral moment in beauty and for good reason. But what exactly is a lip stain, and why should it be your new go-to lip product? Well, get ready to master your perfect pout, because we’re breaking it all down!
A lip stain is exactly what it sounds like, a lightweight formula that helps stain your lips for long-lasting color, without the heaviness of a traditional lipstick. Think of it as a "set it and forget it" option for your lips. The benefits? Plenty. Lip stains are known for their long-wearing magic, meaning you won’t have to worry about constant touch-ups. Plus, they’re transfer-proof, so your coffee cup or clothes won’t be ruined by a swipe of color.
And if you've seen the viral peel-off lip stain trend taking over TikTok, you already know the format has evolved. Enter peel-off lip stains: you apply the tint, let it dry for 10 minutes, peel it off, and you're left with all-day color that doesn't budge. Our Peel of Approval Lip Liner Stain brings that viral trend to life with a precision doe-foot applicator that lets you line, sculpt, or fill — all for just $6.
Not only are they a dream to wear, but they give you that effortless, “I woke up like this” makeup look. Whether you’re going for a natural makeup look or want a bold pop of color, lip stains have you covered. So, let’s get into it!
What is a Lip Stain?
Lip stains work their magic by temporarily staining the skin. The formula penetrates the top layer of your lips, leaving behind a natural, long-lasting color that doesn’t budge as quickly as other lip products. So, how does this work? Lip stains use lightweight formulas, creating a soft, diffused tint that won’t transfer easily. This is what makes them different from most lipsticks, lip glosses, lip balms, and lip oils. Lip stains are usually more tinted than a lip balm, but less pigmented than a lipstick.

The Different Types of Lip Stains
Let’s break down the types of lip stains, because not all stains are the same! First up, liquid lip stains are the classic. Their lightweight, watery formulas give you a smooth, sheer tint that dries down quickly and stays put for hours and won't budge. Our Glossy Lip Stain is our nourishing, high-pigment version of a natural-looking lip stain with a silky, glossy finish.
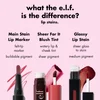
Lip stain pens, like our Main Stain Lip Marker, on the other hand, are exactly what they sound like; think of them as precision tools for your lips. These come with a pen-like applicator, giving you pinpoint control and a defined, long-lasting stain that dries down quickly.
What is the Difference Between Lip Stains and Other Lip Products?
Lip stains, lipsticks, glosses, balms, and lip oils each have their own purpose, and choosing the right one really comes down to your desired makeup look. Lipstick is your classic go-to for bold color. It gives you full coverage and a more dramatic finish. Lip gloss gives you that shiny, plump look. They’re perfect if you want a subtle, natural shine of color.
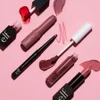
Tinted Lip balms tend to focus on moisturizing the lips while adding a shine of tint. They give a softer, less intense color, perfect for a natural no makeup makeup look.
Lip oil combines the hydrating properties of a lip balm with a lip gloss. It typically contains nourishing oils that moisturize and condition the lips while providing a subtle tint and natural-looking shine.
Feeling adventurous? Layering lip stains with a gloss or a lip color is a fun way to customize your makeup look. Use a lip stain for a long-lasting wear base and top it off with a lip gloss or a punch of lipstick for more dramatic flair!
Benefits of Using a Lip Stain
Aside from that pouty, natural finish you get from using a lip stain, they also have tons of benefits: Long-Lasting Color: The most obvious benefit of using a lip stain is their long-lasting color. Whether you’re eating, drinking, or ahem… kissing, your lip color stays intact. And smudges? Nowhere to be found. Lightweight, Non-transferable Formula: This sets lip stains apart from other lip products. They won’t leave marks on your coffee cup… or anywhere else. Once applied, they’re set and ready to go, no mess, no fuss!
Versatility:
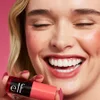
You can build up the intensity depending on your mood—from a soft, flushed lip makeup look to a bold, statement-making pout. Whether you're going for something subtle or daring, lip stains deliver!
How to Choose the Best Lip Stain Shade for You
Ready to find your perfect match? Let's dive into the range of shades for our Peel of Approval Lip Liner Stain. With 5 gorgeous shades to choose from — and the option to grab them all in our 5-Piece Vault — there's a hue for every mood and every skin tone. Here's our breakdown of shades based on your complexion: For Fair Skin If you're rocking a fair complexion, go for a soft, pretty pop of color. Our shade Written in Pink is your go-to here — it's a sweet baby pink that adds a hint of romance without overpowering your natural glow. If you're craving something a touch warmer but still subtle, Bloomscrolling is a rosy pink that's fresh, flattering, and effortlessly chic on fair skin.
For Medium and Olive Skin:
Medium and olive skin tones, listen up! Bloomscrolling is a rosy pink that looks gorgeous against warm undertones — it's your versatile everyday shade. If you're feeling a bit more low-key and want something earthy, Up Latte gives you that cozy, warm vibe while adding just the right amount of depth. And if you're ready for a little extra oomph, Aha Mauvement brings a mauve warmth that complements medium and olive complexions beautifully.
For Deep Skin:
If you're ready to make a statement, Honeymaker is your shade — a rich warm brown that looks stunning on deeper skin tones. It's warm, bold, and lets rich complexions stand out. For a softer but equally gorgeous option, Aha Mauvement delivers a mauve warmth that complements deeper skin beautifully, giving you a defined, polished look with a natural finish.
Can't Decide? Grab the Vault
Why choose just one? Our 5-Piece Vault includes all 5 shades — Bloomscrolling, Aha Mauvement, Written in Pink, Honeymaker, and Up Latte — plus a free gift while supplies last. However you peel, there's an option for you. Mix and match shades for different looks, or layer them to create your own custom lip color. At just $6 a shade, you can grab every single one.
Best Lip Stains for Any Occassion
When life gets busy (or sweaty), lip stains are the MVP’s of your makeup bag. Let’s talk about when they really shine: Long workdays: Whether you’re powering through meetings or running errands, lip stains are your low-maintenance hero with lasting power. Special events and weddings: Crying during the vows? Lip stains are smudge-proof, kiss-proof, and celebration-proof, meaning your lips will still look photo-ready by the end of the night.

Hot weather activities: Spring and summer are on their way, and lip stains stand the test of hot temps and humidity. Unlike lipsticks or glosses that can melt, smear, or feel sticky, stains stay weightless and vibrant.
Travel and on-the-go: Lip stains are the ultimate "apply and forget" product, perfect for a fresh, effortless look that lasts through busy days.
Step-By-Step Guide for Applying a Lip Stain
Step 1: Exfoliate Your Lips
Lip stains work by soaking into your lips (remember, they stain the top layer of skin), so any dry, flaky bits may cause uneven color or a patchy finish. To avoid this, start by gently buffing away dead skin with a lip scrub like our Sugar Lip Exfoliator, which smells delicious and creates a smooth, exfoliated base for your lips. The goal is to create a smooth, soft canvas that helps your lip stain absorb evenly and last even longer.
Step 2: Line Lips with a Lip Liner Stain
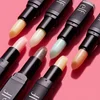
Next up: lining your lips. Yes, lip stains are all about that easy, lived-in look — but lining first goes a long way in keeping things polished (and preventing any "coloring outside the lines" mishaps). Lining your lips gives you extra definition, and it acts like a boundary to help your lip stain stay exactly where you want it — no feathering or smudging. Plus, if you fill in your lips lightly with your liner before adding your lip stain, you'll get an even richer, more long-lasting color. Here's the fun part: you don't even need a separate lip liner. Two of our lip stains double as liners, so you can line, define, and fill all with one product. Here's how to choose your liner-stain:
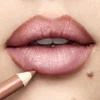
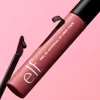
This life-proof lip stain marker features a felt tip applicator that makes it easy to sculpt, shade, and fill in your pout with buildable, lasting colour and a natural finish. The magic is in the tip — use the thin side to line and define your lips, then flip the marker to the flat side to contour and fill in the rest.
How to line with it:
- Start with completely clean lips — no lip balm or other makeup.
- Use the thin side of the felt tip to line and define your lips, working one section at a time.
- Flip the marker to the flat side to contour and fill in the rest of your lips, then dab with your finger to blend.
- Layer as desired to build intensity. Follow with gloss or lipstick if desired.
Shades: Available in 8 shades to complement a range of skin tones.
Peel of Approval Lip Liner Stain
Want the viral peel-off lip stain trend at an e.l.f. price? Our Peel of Approval Lip Liner Stain is a long-wear, high-pigment lip stain with a slim doe-foot applicator that lines, sculpts, or fills your lips — then peels off after 10 minutes to reveal long-wearing color with a natural finish. No touch-ups, no reapplication, no fading.
How to line with it:
- Start with clean, dry lips.
- Use the slim doe-foot applicator to outline and define your lip line — the precision tip gives you clean, controlled edges.
- If you want fuller-looking definition, slightly overline just outside your natural lip shape, staying close for a plump-but-believable look.
- Fill in your lips completely with an even layer of the high-pigment tint.
- Let it dry for 10 minutes, then gently peel the film off starting from one corner to reveal your long-wearing stain.
That's it — no touch-ups, no reapplication needed.
Shades: Available in 5 shades, including Bloomscrolling (Rosy Pink), Aha Mauvement (Mauve), Written in Pink (Baby Pink), Honeymaker (Warm Brown), and Up Latte.
Step 4: Apply Your Lip Stain
It’s finally time for the main event: applying your lip stain! How to apply a peel-off lip stain: If you're using a peel-off lip stain like our Peel of Approval Lip Liner Stain, the application is a little different — and honestly, kind of fun:
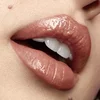
That's it: No touch-ups, no reapplication. The color stays put through coffee, meals, and whatever your day throws at you.
Pro tip: For the most even color, apply the tint in smooth, connected strokes and avoid going back over areas that have already started to dry. Once the film is dry and you peel, you'll see exactly where any thin spots are — you can always do a quick touch-up layer on specific areas and repeat the peel process.
How to apply a marker lip stain:
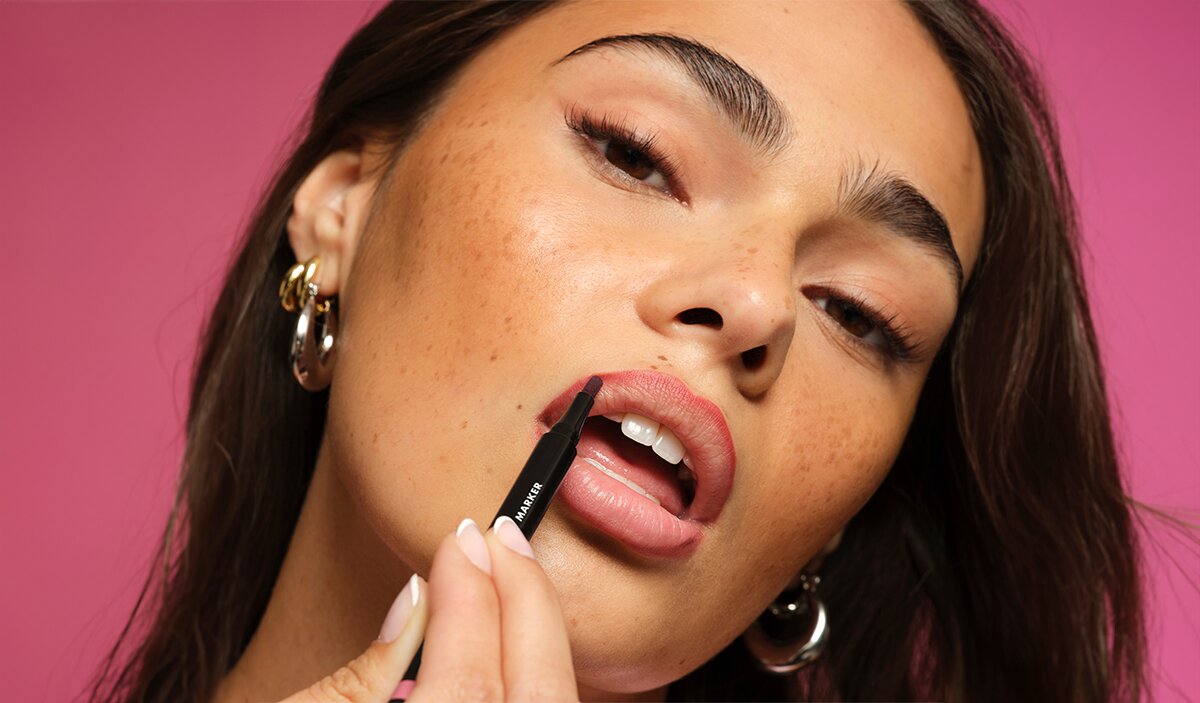
If you're using a felt-tip marker lip stain like our Main Stain Lip Marker, application is goof-proof — just think of it like coloring in your lips. The felt tip gives you total control, and the buildable formula means you decide how bold to go.
- Start with completely clean lips: no lip balm, no gloss, nothing — marker stains need a clean surface to grip.
- Line your lips with the thin side of the felt tip: starting at your cupid's bow, work your way outward along your natural lip line, one section at a time. This gives you a clean, defined edge.
- Flip the marker to the flat side to fill in: use the wide edge of the felt tip to contour and fill in the rest of your lips with an even layer of color.
- Dab to blend: gently press and dab with your finger to soften and blend the color for that natural, lived-in stained look. Don't drag — just tap.
- Layer to build intensity: want more pigment? Apply one thin coat, wait until it's completely dry (about 60–90 seconds), then add another layer. The buildable formula lets you customize your color depth — go sheer for a soft tint or build up for bolder color.
Pro tip: Keep your Main Stain Lip Marker performing at its best by giving the applicator tip a quick swipe with a makeup remover wipe after use. This clears away any product buildup and keeps it ready for a smooth, precise application next time. Store it tip-down to maintain consistent ink flow and extend its life.
Step 5: Clean Up the Edges with Concealer
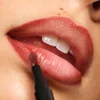
This product is meant to stay put, which is great for your lips, but not so much for the skin around them if you accidentally go outside the lines. To keep things clean and crisp, grab a wet Q-tip and gently swipe away any blurred edges before the stain sets. For extra precision, dab a bit of Hydrating Camo Concealer onto our Small Angled Eyeliner Brush (yes, eyeliner brushes double as lip stain cleanup pros!) and trace around your lips. This sharpens the edges and gives your lips that flawless, makeup-artist-level look.
Common Mistakes to Avoid When Applying a Lip Stain
Now that you’ve learned how to master applying a lip stain, here are a few things to avoid: Dry, chapped lips: Lip stains may cling to dry patches on your lips, leaving you with a cracked, dry, and uneven finish that’s exactly what we’re *not* going for. Always remember to exfoliate and hydrate your lips first for a smooth, even canvas! Overloading on product: More isn’t always better! Piling on too much lip stain at once can lead to a smeary, blurred mess. Start with a thin layer, build gradually, and you’ll nail that perfect, effortless finish.

Tips on How to Make Your Lip Stain Last Longer
Want your lip stain to go the distance? It’s all about prepping, setting, and reapplying. Let’s break it down: Prep your lips: Start with smooth, hydrated lips. Exfoliate away any dry skin, then dab on a hydrating lip balm and blot off any excess. This keeps your lips soft without making the stain slip. Set your lips: After applying your lip stain, give it a moment to dry down. For extra staying power, lightly blot with a tissue; this removes excess product while locking in the color.

Reapply as needed: As the glossy tint fades, go back in with another thin layer, or top it off with a tinted lip balm for instant shine.
How to Remove a Lip Stain
Not feeling your lip stain anymore? No need to fret; even the most stubborn stains can be undone. For a quick fix, reach for an oil-based makeup remover; this helps break down long-wearing pigments like magic. Just massage the makeup remover onto your lips and wipe away with a cotton pad. For extra stubborn stains, gently exfoliate with a sugar scrub to lift lingering color. Whatever method you choose, be gentle no harsh rubbing! Good news for peel-off lip stain fans: When you're ready to switch up your color, peel-off lip stains like Peel of Approval come off easily with an oil-based makeup remover or a gentle cleansing balm. Massage it in, wipe away, and you're ready for your next shade.
FAQs
Got questions about lip stains? We've got answers — from how long they last to how to apply, remove, and choose the right shade.
A peel-off lip stain is a newer lip stain format that goes on as a high-pigment tint, dries down in about 10 minutes, and then peels off to reveal a natural, long-wearing stain underneath. Think of it as a "set it and forget it" lip color — once you peel, the color stays with no reapplication. Our Peel of Approval Lip Liner Stain features a slim doe-foot applicator so you can line, sculpt, or fill with precision, and it comes in 5 shades for just $6 each.
Apply an even layer of the tint to clean, dry lips using the applicator — line, fill, or both. Let it dry completely for about 10 minutes, then gently peel the film off starting from one corner. The stain left behind is your long-wearing color. No touch-ups needed.
A lip stain typically lasts 6–8 hours without needing a touch-up, depending on the formula and how well you prep your lips. Peel-off lip stains like our Peel of Approval Lip Liner Stain are designed for all-day wear with no reapplication needed — the high-pigment tint dries down, you peel it off after 10 minutes, and the color stays put.
The main difference comes down to how the color wears and how it's formulated. Traditional lipstick sits on the surface of your lips, delivering rich, opaque color — but it can transfer onto cups, clothes, and skin, and typically needs reapplication throughout the day.
A lip stain, on the other hand, is a lightweight formula that temporarily stains the top layer of your lips, creating a soft, diffused tint that's less likely to transfer. Lip stains are usually more pigmented than a lip balm but less opaque than a lipstick, giving you that effortless, "I woke up like this" look. They need fewer touch-ups than lipstick and won't leave marks on your coffee cup.
Lip stains themselves are lightweight formulas, but because they absorb into the top layer of your lips, they can cling to dry patches if your lips aren't properly prepped. That's why prepping your lips first is so important — exfoliate to remove dead skin, hydrate with a thin layer of lip balm, and blot off any excess before applying your stain. This creates a smooth, hydrated base that helps the stain absorb evenly and prevents that cracked, uneven finish.
Absolutely! Layering lip gloss over a lip stain is one of the easiest ways to customize your look. Apply your lip stain first, let it dry down completely, then swipe on your favorite gloss or lip oil for instant shine. The stain underneath stays put, so even as the gloss naturally fades, you're still left with a soft, stained tint.
You've got options: leave the stain bare for a more subtle, natural look, reapply gloss for fresh shine, or top it off with a clear lip gloss if you're a fan of a high-gloss sheen. It's the best of both worlds — long-wearing color from the stain plus the shine and hydration of a gloss.
Even the most long-wearing lip stains can be removed with the right approach. For a quick fix, reach for an oil-based makeup remover — it helps break down long-wearing pigments. Just massage the makeup remover onto your lips and wipe away with a cotton pad.
For extra stubborn stains, gently exfoliate with a sugar scrub to lift lingering color. Whatever method you choose, be gentle — no harsh rubbing or scrubbing, which can irritate your lips.
Yes — lip stains are known for their transfer-resistant color. Because the formula stains the top layer of your lips rather than sitting on the surface, the color is far less likely to transfer onto cups, clothes, or skin than a traditional lipstick or gloss. That means no more lipstick marks on your coffee cup or smudges on your collar.
Our Main Stain Lip Marker is specifically formulated to be transfer-resistant — the felt-tip marker delivers high-pigment color with serious stain power, so your color stays where you put it with no touch-ups needed.
Yes! Some lip stains are designed to do double duty as both a liner and a stain, so you can line, define, and fill all with one product.
Our Main Stain Lip Marker features a felt-tip applicator with two sides — use the thin side to line and define your lips, then flip to the flat side to contour and fill in. It's buildable, so you can go from a soft tint to bolder color by layering thin coats.
Our Peel of Approval Lip Liner Stain takes it a step further with a slim doe-foot applicator that gives you clean, controlled edges for lining, sculpting, or filling — then peels off after 10 minutes to reveal long-wearing color with no reapplication needed. It's a liner and a stain in one.